Typography Task 3A : Type Design and Communication
15.10.2021 - 29.10.2021 (Week 8 - Week 10)
Sasilvia Cheong Pei Hoong / 0345031 / Bachelors of Design in Creative Media
Typography
Task 3A: Type Design and Communication
LECTURES
Lecture 1-5 : Typography / Task 1: Exercise
INSTRUCTIONS
Task 3: Type Design and Communication
We were tasked to create a typeface for the letters (a i m e p y t g d o b ! , .) that has the hallmarks of a good typeface; subtlety, character,
presence, legibility and readability.
Research
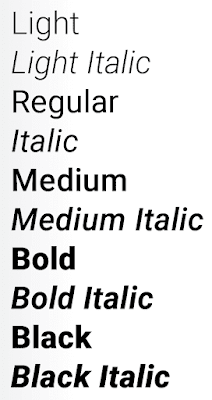
Fig. 1.1 Font styles
First I wanted to look at the font styles whether I like it to
have technical or rigid layouts.

Fig. 1.2 Rigid fonts
I decided to look up on rigid fonts where the lines are more
clean and precise.

Fig. 1.3 90's diner typeface
I was not able to find the name of this typeface but it
personally reminds me of those old 90's diner kind of fonts. I
find the way they balanced out the thin and thick lines are very
interesting and makes it look classic.
My Sketches

Fig. 2.1 Typeface sketches (17/10/2021)

Fig. 2.2 Random sketches (18/10/2021)
After doing my research on typefaces and design, I
sketched out three typefaces, I wanted to go with a more
futuristic design and I ended up liking the 3rd sketch more in
Fig. 1.1 since the lines beside the letters gives the design more
depth to it. In Fig. 1.2 are random sketches I made but I decided
not to use them as they were not consistent enough.
Deconstruction
Out of the 10 typefaces we were given, Univers LT Std 45 Light was chosen as my reference as the
letter "a" was the same a as my chosen sketch and the structure of
the typeface is rigid and has lesser complexity.

Fig. 3.1 Letter "a" deconstructed (20/10/2021)

Fig. 3.2 Letter "g" deconstructed (20/10/2021)

Fig. 3.3 Letter "t" deconstructed (20/10/2021)
Digitalization

Fig. 4.1 Creating guidelines (20/10/2021)
This guides are created by following Mr. Vinod's tutorial video.
Where the letters "Tyd" in the font Myriad Pro was used as
guidelines. The lines are ascender line, capital line, mean/median
line, baseline, descender line. While the square box is used for
the x-height which is (500pt x 500pt).


Fig. 4.4 First design construction progress (21/10/2021)

Fig. 4.5 First design (21/10/2021)
I decided to tryout constructing my first sketch first before
going for the third one just to get an idea of how I would be
creating my font in Illustrator. The first sketch design was
pretty simple so it did not take me long to finish. The first
sketch design turned out pretty clean and neat.


Fig. 4.6 Second design (21/10/2021)


Fig. 4.7 Second design first attempt (21/10/2021)
After constructing the structure for the letters, I went into
creating the triangles that will be on the right side of the
letters.

Fig. 4.8 Parts to adjust (26/10/2021)
During feedback session Mr. Vinod suggested to change these few
things:
- The vertical lines beside the letters should have a large space between the letter
- The dot on "i" should be bigger then the straight line stroke, so the other dots should be changed as well
- The horizontal line should reconsider to make it thicker
- The end of the stroke of an exclamation mark should be slightly tapered
- The tick of the comma should tick in and not straight

Fig. 4.9 Second design second attempt (26/10/2021)

Fig. 4.10 Evolution of the letter "m"
The "m" had the most changed from the first attempt and second
attempt. The first one is that the line beside the letter is
now further apart. Secondly, I decided to not show as stroke
on the top of the "m". The horizontal lines are also now
thicker.
 Fig. 4.11 Readjusting the height (26/10/2021)
Before proceeding to generate my font in FontLab I had to
readjust the height according to the x-height 500pt. I also
did measurements to the font.
Ascender Line: 718pt
Cap Line: 682pt
Median Line: 500pt
Baseline: 0pt
Descender Line: -213pt

Fig. 4.12 After adjusting the height (26/10/2021)
FontLab

Fig. 5.1 Letters generated in FontLab (26/10/2021)
The letters took me a while to generate since I accoutered
some issues with FontLab7 since it was lagging so much and
ended up not processing any of my letters. After that, I
had to use FontLab5 instead and it ran way smoother there
and I got it done in no time.

Fig. 5.2 Before kerning in FontLab (26/10/2021)
After generating my letters, I started to work on
kerning.

Fig. 5.3 After kerning in FontLab (26/10/2021)
The kerning took a while, but I am satisfied with the
results. After I was done with kerning, I exported my
typeface and opened it in FontLab7 since FontLab5
mutated my entire typeface and exported it in FontLab7
again.
A4 Poster
I named my font opiem because this meme about
"copium" has been stuck in my head for
months. Copium is a combination of Cope (creating a
psychological defense of a lighter belief to deal with
a harsh truth) and Opium (a Drug). So since we did not
create the letter "u" I thought it would be nice to
replace it with an "e" instead so that I will be able
to type it out with the font I created.

Fig. 6.1 A4 poster 1 (28/10/2021)

Fig. 6.2 A4 poster 2 (28/10/2021)

Fig. 6.3 A4 poster 3 (28/10/2021)
I used the initials from an anime called "Attack on
Titan".

Fig. 6.4 A4 poster 4 (28/10/2021)

Fig. 6.5 A4 poster 5 (28/10/2021)

Fig. 6.6 A4 poster 6 (28/10/2021)

Fig. 6.7 A4 poster 7 (28/10/2021) Updated
Since Mr. Vinod said that my final poster that is
fig.6.5 was not good as it does not do justice to
my typeface I decided to create a new one which is
fig.6.7 where I made my font size larger and added a
line which has the same thin line beside of the thick
one just like my font, the line indicates the insertion
point when you type but this one is in the front.
Preview
Want to type me out?
Try typing with the letters (
a i m e p y
t g d o b !
, . )
Have fun!
Final Outcome

Fig. 7.1 "copiem" Task 3A: Type Design and Communication JPEG (28/10/2021)

Fig. 7.2 "copiem" Task 3A: Typo Poster A4 JPEG (28/10/2021) Updated
Fig. 7.3 "copiem" Task 3A: Type Design and Communication PDF (28/10/2021)
Fig. 7.4 "copiem" Task 3A: Typo Poster A4 PDF (28/10/2021) Updated
FEEDBACK
Week 9
General Feedback:
Be very careful and consistent with your design.
Specific Feedback:
Overall the design is consistent. The line beside the letter
should be spaced apart more to that it will not disappear when
the font size is small. Might have to consider about the
horizontal line thickness, try to make it thicker a little
bit. The comma should tick in and not be straight. The dots
are bigger than the stem so have to make some changes for the
"i" and the dots. For the exclamation mark it is never a
straight line, there will be a little tapering towards the end
of the stroke.
REFLECTIONS
Experiences
I really like this project and I was actually surprised that
we area able to create our own typeface from scratch. The
digitalizing part definitely was a hassle especially when I
accoutered some problem with FontLab everything else turned
out great. This project definitely has open a new perspective
for me with typefaces as I now know how hard is it to make one
and imagine creating a typeface with all the letters and
symbol, I admire those people who are able to do so.
Observation
I found that being able to more observant to look out for
minor details to keep a typeface consistent is very
important. As a minor difference can be noticed and can
change the whole look of that specific letter.
Findings
I find that creating a typeface requires a lot of time,
dedication and you have to put all of your heart and soul into
creating it.
FURTHER READINGS
I decided to go with Typography Referenced for my further
reading this time as I found various of information about
typefaces at the type classification and identification
section that could help with this project.

Fig.1.1 Typography, Referenced: A Comprehensive Visual
Guide to the Language, History, and Practice of
Typography


Fig.1.2 Typefaces
Typefaces fall into one of the three basic groups:
1. Those with serifs (little feet and tails)
2. Those without serifs
3. Scripts (designed to look like cursive
handwriting)

Fig.1.3 Serif Transitional- Baskerville
Serif Transitional:
John Baskerville an English printer and
typographer established the style for these
typeface in the middle of the eighteenth century.
The reproduction of much finer character strokes
and the maintenance of subtler character shapes
has been allowed by his work with calendared paper
and improved printing methods.

Fig.1.4 Serif Glyphic- Albertus
Serif Glyphic:
Typefaces in this category tend to reflect
lapidary inscriptions rather than pen-drawn
text.

Fig.1.5 Serif Slab- Rockwell
Serif Slab:
Slab serif typefaces became popular in the
nineteenth century as advertising display
designs. These typefaces have very heavy serifs
or no bracketing.

Fig.1.6 Sans Serif Grotesque- Rockwell
Sans Serif Grotesque:
These are the first commercially popular
sans serif typefaces. Contrast in stroke
weight is most apparent in these styles,
there is a slight “squared” quality to many
of the curves, and several designs have the
bowl-and-loop lowercase common to roman
types. In some cases the R has a curled leg
and the G usually has a spur. Some modern
sans serif designs derive from the first
Grotesques, but are more refined in
form.

Fig.1.7 Sans Serif Geometric- Futura

Fig.1.8 Examples of Sans
Serif Geometric
REFERENCES
Fig. 1.1 Font styles
https://identity.stanford.edu/design-elements/typography/accent-typefaces/
Fig. 1.2 Rigid fonts
https://www.myfonts.com/tags/rigid
Fig. 1.3 90's diner typeface
https://www.pinterest.com/pin/157766793181693454/
Further readings-
Typography, Referenced: A Comprehensive Visual Guide to
the Language, History, and Practice of Typography, Allan
Haley, Richard Poulin, Jason Tselentis, Tony Seddon, Gerry
Leonidas, Ina Saltz, Kathryn Henderson with Tyler
Alterman, February 2012.


Comments
Post a Comment