Advanced Typography - Task 2: Key Artwork and Collateral
25/4/2022 - 31/5/2022 (Week 5 - Week 9)
Sasilvia Cheong Pei Hoong / 0345031 / Bachelors of Design in Creative MediaAdvanced Typography
Task 2 : Key Artwork and Collateral
LECTURES
Lecture 1-4 : Advanced Typography - Task 1: Exercises
WEEK 5
Lecture 5: Perception and Organisation
Perception in typography deals with the visual navigation and
interpretation of the reader via contrast, form and organisation of the
content. Content can be textual, visual, graphical or in the form of
colour.
Contrast
Carl Dair posits 7 kinds of contrast
- Size
- Weight
- Contrast of form
- Contrast of structure
- Contrast of texture
- Contrast of colour
- Contrast of direction
Contrast of size
Provides a point to which the reader's attention is drawn. For example if
you have a big letter and a small letter you will obviously see the big
letter first before the small. The most common use of size is in making a
title of heading noticeably bigger than the body text.
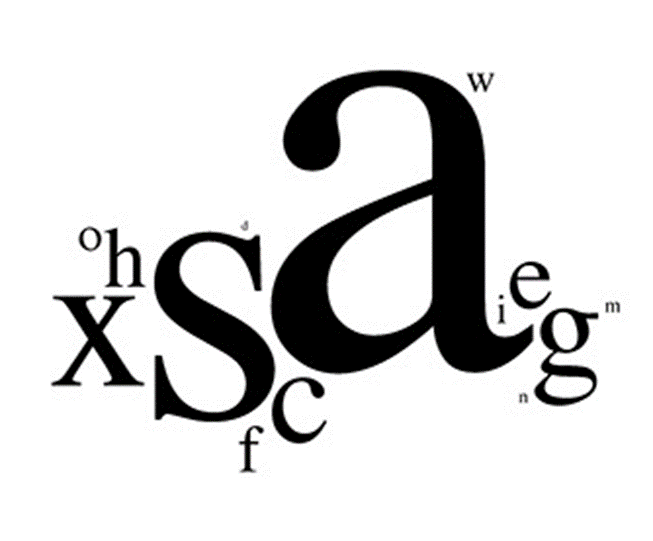
Fig. 1.1 Contrast of size
Contrast of weight
Weight describes how bold type can stand out in the middle of lighter
type of the same style. Other than using bold, rules, spot, squares also
provides a "heavy area" for a powerful point of visual attraction or
emphasis, therefore not only type of varying weight.

Fig. 1.2 Contrast of weight
Contrast of form
Is the distraction between a capital letter and its lowercase equivalent,
or a roman letter and its italic variant, condensed and expanded versions
of typeface area also included under the contrast of form.

Fig. 1.3 Contrast of form
Contrast of structure
The different letterforms of different kinds of typefaces. For example,
a monoline sans serif and a traditional serif, or an italic and a
blackletter.

Fig. 1.4 Contrast of structure
Contrast of texture
By putting the contrast together, the contrasts of size, weight, form,
and structure, and applying them to a block of text on a page, you come
to the contrast and texture. Texture refers to the way the lines of type
look as a whole up close and from a distance. This depends partly on the
letterforms themselves and partly on how they area arranged.

Fig. 1.5 Contrast of texture
Contrast of direction
Contrast of direction is the opposition between vertical and
horizontal, and the angles in between, Turning one words on its side
can have a dramatic effect on a layout. text blocks also have their
vertical or horizontal aspects of direction. Mixing wide blocks of
long lines with tall columns of short line can also create a
contrast.

Fig. 1.5 Contrast of direction
The use of colour is suggested that a second colour is often less
emphatic in values than plain black on white. Therefore it is
important to give thought to which element needs to be emphasized and
to pay attention to the tonal values of the colours that are
used.

Fig. 1.5 Contrast of direction
Form
Form refers to the overall look and fell of the elements that make up the
typographic composition. It is the part that plays a role in visual impact
and first impressions. A good form in typography tends to be visually
intriguing to the eye, it leads the eye from point to point, entertains
the mind and is most often memorable.

Fig. 1.6 Example of form 1
Originating from the Greek words "typos" (form) and "graphis" (writing), typography means to write in accordance with form. Typography can be seen as having two functions which is to represent a concept and to do so in a visual form. Displaying type as a form provides a sense of letterforms unique characteristics and abstract presentation.

Fig. 1.7 Example of form 2
Form brings a balanced harmony both in terms of function and expression.
When a typeface perceive a form, it no longer reads as a letter because it
has been manipulated by distortion, texture, enlargement, and has been
extruded into a space.

Fig. 1.8 Example of form 3
Organisation/ Gestalt
Gestalt is a German word meaning the way a thing has been "placed: or "put
together".
Perceptual Organisation/ Groupings
- Law of similarity
- Law of Proximity
- Law of closure
- Law of continuation
- Law of symmetry
- Law of simplicity (Praganz)

Fig. 1.9 Gestalt principles of grouping
Law of similarity
Similarity can refer to any number of features, including colour,
orientation, size, or indeed motion.
Law of proximity
This straightforward law states that items close to each other tend to be
grouped together, whereas items further apart are less likely to
be grouped together.
Law of closure
Refers to the mind's tendency to see complete figures or forms even
if a picture is incomplete, partially hidden by other objects, or if part
of the information needed to make a complete picture in our minds is
missing.
Law of (good) continuation
It holds that humans tend to perceive each of two or more objects as
different, singular, and uninterrupted object even when they intersect,
The alignment of the objects or forms plays a major role for this
principle to take effect.
Law of symmetry
Elements that are symmetrical to each other tend to be
perceived as a unified group.
Law of simplicity (Praganz)
When your presented with a set of ambiguous or complex objects,
your brain will make them appear as simple as possible.
INSTRUCTIONS
Task 2(A) : Key Artwork
For this task we were required to use our initial letters of our
name or our full name. Explore and compose as many permutations
and combinations of these initials. The final key artwork must be
an elegant solution, not complicated or confusing that leads to a
functional and communicable key artwork.
First we were tasked to choose the career we want aside from being a
designer. After that find references and sketch out our ideas.
Then digitalize it in Illustrator in black and white first before
finalizing it with colour.
I always wanted to go towards the culinary arts field and become a
café owner in the future.
Inspiration
First, I started looking at design inspirations on Pinterest and these
few interest me.

Fig. 1.1 Inspiration 1 (25/4/22)

Fig. 1.2 Inspiration 2 (25/4/22)

Fig. 1.3 Inspiration 3 (27/4/22)

Fig. 1.4 Inspiration 4 (27/4/22)

Fig. 1.5 Inspiration 5 (27/4/22)

Fig. 1.6 Inspiration 6 (27/4/22)
Sketches
Then, I sketched out some ideas I had for my logo before digitalizing
them in Illustrator. My idea was having them to be shaped like a
something that are sold in a café such as, a cookie, cake, bread and
even a glass of water. Throughout the designs I sketched the 5th one
lay a huge interest on me.

Fig. 2.1 Sketches 1 (27/4/22-29/4/22)
I tried sketching more variations of the 5th design to see how well it
will go and try to make the text as consistent as possible.

Fig. 2.2 Sketches 2 (29/4/22)
Digitalization
Digitalizing this was a huge struggle, since it was suppose to be
shaped like a triangle, it was hard to get the font to stay consistent
while having them to stay in one certain shape. In the end I decided
to try another idea instead since this one is not going
anywhere.

Fig. 3.1 First tryout for sketch 5 (30/4/22)

Fig. 3.2 Second tryout for sketch 5 (30/4/22)
I decided to pick the 7th sketch to digitalize next, after
digitalizing it, I found that it does not really suit my theme that
well and the visuals looks rather odd, it was also because I had to
force the text to stay in a triangle shape.

Fig. 3.3 Tryouts for sketch 7 (30/4/22)
So going onto my third try on another sketch which is sketch 3, I
really fell in love with this one. The structure and balance was
great.

Fig. 3.4 Tryouts for sketch 3 (1/5/22)
Looking back at the digitalization I did in week 5, the structure of
the logo was rather stiff and looked like it lacked something. So I
went back to Illustrator to refine it even more. I tried giving the
inner corners of the logo a more curve touch to it and it looked way
much better. I also readjust the middle point of the "P" and "H" to be
align to the center since it was off. Then I move the letter "S" in
the logo down a little more since the space in between was too much.

Fig. 3.5 Draft 1 (7/5/22)
After looking at the logo multiple times something still felt out.
Then I realized that the bottom part of the letter "S" in the logo was
not align to be in the middle. I also changed the corner curve of all
the lines to 33px to make it more rounder like the inner corners. Then
I did final readjustments with the lines and circle to make them more
even and balance with each other. Looking at my logo I find it to be
very on theme with the café that I am going for as it looks like a
cake with a cherry on top! It kind off looks like a cookie and the
letter "S" looks like a mug.

Fig. 3.6 Draft 2 (7/5/22)
Tried taking out the circle too, not sure how I feel about it.

Fig. 3.7 Draft 3 (7/5/22)
After receiving feedback from Mr. Vinod, I needed to utilize the mug
idea even more. So from there, I went onto illustrator to make a few
idea attempts utilizing the cup idea. Though after doing it I still
feel that it lacked something.

Fig. 3.8 Draft 4 (9/5/22)
My brain was starting to lag at this point, to prevent getting art
block I sketched out all my ideas in Procreate before going back to
Illustrator again.

Fig. 3.9 Sketches 3 (10/5/22)

Fig. 3.10 Draft 5 (16/5/22)
I tried to refine the second idea from draft 5 but it felt way too
simple and plain for me.

Fig. 3.11 Draft 6 (18/5/22)
I decided to add back the letters P and H and make the lines thinner.
I readjust the bottom part of the letter S to make the mug less fat.
Finally did a few adjustments to the measurements and scaling. In the
end, I felt that this design looks the best as the letter P looks like
a person and the letter H is like the table while the C is like a room
and the S is a mug.

Fig. 3.12 Draft 7 (18/5/22)

Fig. 3.13 Key artwork coloured (18/5/22)
We were tasked to create:
- Poster A3
- Animated invite (800x800/1024x1024px)
- 3 relevant collateral of choice
Poster
Inspiration
Before starting the layout I went to look for some inspirations on
Pinterest I have always liked cyberpunk looking things. The neon
colours really draw me in.

Fig. 4.1 Poster inspiration 1 (15/5/22)

Fig. 4.2 Poster inspiration 2 (15/5/22)

Fig. 4.3 Poster inspiration 3 (15/5/22)
Poster Details:
Title: Dystopian (Manga Café Event by Sasilvia Cheong Pei
Hoong)
Venue: Phosphors Exhibition Hall
Date: July 7th 2022
Time: 9am-10pm
Contact Number: 011-3740 6677
Email Address: sasilviacph@gmail.com
Description: Chill under the neon lights
Digitalization:
Since the theme of my manga café is cyberpunk I wanted to
incorporate neon colours into the posters, I tried doing multiple layouts
while some of them look like glitches and some looked like a retro video
game.
The font that I used was: JSL Data GothicR Regular
https://www.fontspace.com/jls-data-gothic-font-f14039


Fig. 5.1-5.6 Posters layout draft (19/5/22)
I was still confused and rather unsure about the layout so I decided to
play around with the logo and create repetition patterns. I actually
really liked the 3rd and 4th one but after looking at it longer it felt
like it did not suit the theme of a manga café at all rather it looks
more like some mechanical, hacker kind of style.


Fig. 5.7-5.12 Posters layout draft (19/5/22)
Looking back at fig. 4.1-4.6 I found that fig. 4.6 might be able to work
with the idea but it definitely needed a few adjustments. I also tried
out the Gaussian blur in fig. 4.8 to give it a neon sign effect but it
was way too overpowering and extremely harsh on the eyes that I almost
threw up. That said, I went on trying out other colours but I did not
like them at all as they felt bland and boring. I really liked the pop
that the black background gives to the colours.


Fig. 5.13-5.15 Posters layout draft (20/5/22)
After multiple tries and headaches later, I adjust the brightness of the
green to make it less harsh and darken the purple while increasing the
contrast of it. Then I adjusted everything to the grids and changed some
of the text sizes.

Fig. 5.16 Colour palette (20/5/22)

Fig. 5.17 Poster with grids (20/5/22)

Fig. 5.18 Poster (20/5/22)
Did a poster mockup with the template from https://mockups-design.com/poster-frame-mockup/

Fig. 5.19 Poster Mockup (22/5/22)
After the feedback session, I enlarged my key artwork and utilize the
shapes to insert my information into them and added another small key
artwork to show it fully. I trashed the green outlines and
rectangles.

Fig. 5.20 Poster grids updated (26/5/22)

Fig. 5.21 Poster updated (26/5/22)
I also redid my poster mock-up with the new poster design.

Fig. 5.21 Poster Mockup updated (26/5/22)
Animated Invite
Before moving to After Effects for the animation I had to separate
the layers according to the objects I wanted to animate and creating
the layout of the animation, takes time but it is kind of fun.

Fig. 6.1 Separating layers in Illustrator (21/5/22)
For the water filling up motion, I created a rectangle shape
underneath my vector and then applied the wave warp effect then tweak
the settings a little to match the movements I wanted. After that to
mask the waves onto the vectors I used TrkMat which is found in the
tools option and changed it to alpha matte.

Fig. 6.2 Wave warp effect (21/5/22)
As for the neon sign effect at the end of the word "Dystopian", I
added another background layer on top of my word and then I
downloaded a plugin which is this one
https://www.videocopilot.net/tutorials/saber_plug-in/ and placed it in the new background layer that I just
created. Then I go to the effects option for the plugin and go to
customize core and change the core type to text layer and locate it
to my "Dystopian" text layer. After that, I go to the preset and
changed it to neon, then change to the colour of my choice and did
adjustments on glow intensity, glow spread, glow bias, core size and
halo intensity. To make the neon sign move I go layer, new and press
on the camera option and then create a null object and parent the
camera to the null object allowing me to adjust the movements of my
animation. The other animation like the light flickering is made by
adjusting the opacity.

Fig. 6.3 Saber plugin (21/5/22)

Fig. 6.4 Animated invite (21/5/22)
During the feedback session, Mr. Vinod said that the animation
for the title "DYSTOPIAN" is nice but it is taking most of the
attention from the key artwork. So to fix that I decided to use
the Vegas and glow effect to enhance the key artwork more as
it also creates a neon effect to the artwork as well as giving it
more flow. Other than that I changed the sequence of the key
artwork with the title as I wanted the key artwork to leave a more
lasting impression. Last but not least, some font size and scaling
has been changed to improve the composition of the animated
invite.

Fig. 6.5 Vegas and glow effect (27/5/22)

Fig. 6.6 Animated invite updated (27/5/22)
Collateral
For the collateral I picked these 3 items as I think they suit the
theme:
- Mug
- Event pass + member card with a lanyard
- Roasted Coffee Grounds
Having a café means a mug will definitely be the first thing people will
think of. I found the image of the mug at https://www.freepik.com/photos/coffee-tea

Fig. 7.1 Mug draft (21/5/22)
I tried doing on another mug image that I took from
https://www.freepik.com/photos/mug and it looks way better. For the shadows, I painted them on
myself.

Fig. 7.2 Mug draft (21/5/22)
It took me forever to find pictures to place my design on and I just
found out through a friend that there are mockup files :'D. So with
that new knowledge in hand, I tried making a new mug again. It was so
much better, can not believe I spend 4hrs finding a decent picture of
a mug when I can just do this. The mockup file I used was
this https://mockups-design.com/ceramic-mug-on-a-slice-of-wood-mockup/

Fig. 7.3 Mug draft 2 (22/5/22)
Tried another mock-up since I wanted to have the colour purple
inside the mug as well. Mockup file used: https://mockups-design.com/free-tapered-mug-mockup/

Fig. 7.4 Mug draft 3 (26/5/22)
I made an extra collateral since I have planned on making an
event pass + member card with a customized lanyard along with
it. The purpose of making the event pass and member card into
one card is so that after the event people are still able to use
the card and visit the manga cafe to purchase their order.
Mockup file used: https://mockups-design.com/free-lanyard-id-badge-mockup/

Fig. 7.5 Event pass + member card with a lanyard front
view (26/5/22)

Fig. 7.6 Event pass + member card with a lanyard back
view (26/5/22)
For my third collateral, I decided to make a package
filled with roasted coffee grounds so that the people
who joined the event can go back home and brew their own
coffee, the packaging is made from paper which is able
to be recycled when done.
Mockup file used: https://mockups-design.com/kraft-paper-doypack-mockup/

Fig. 7.7 Roasted Coffee Grounds (27/5/22)
Final Key Artwork and Collateral


Occupation: Manga Cafe Owner
Approximate time taken
Key Artwork: 18 hours
Poster: 15 hours
Animated Invite: 10 hours
Collateral: 5 hours
Total: 48 hours

Fig. 8.1 Final key artwork JPEG (22/5/22)

Fig. 8.2 Final key artwork coloured JPEG(22/5/22)

Fig. 8.3 Final poster JPEG (26/5/22)

Fig. 8.4 Final poster mockup JPEG (26/5/22)

Fig. 8.5 Final Animated invite GIF (27/5/22)

Fig. 8.6 Final mug JPEG (26/5/22)

Fig. 8.7 Event pass + member card with a lanyard front
view (26/5/22)

Fig. 8.7 Event pass + member card with a lanyard back
view (26/5/22)

Fig. 8.8 Roasted Coffee Grounds (27/5/22)

Fig. 8.9
Flat lay of Task 2 (27/5/22)
Fig. 8.10 Final compilation of Key artwork and Collateral
PDF (27/5/22)
FEEDBACK
Week 7-
General Feedback: Avoid using
colours during the process of creating the logo. Try to make the
form more balance.
Specific Feedback: The triangle
draft is a little bit hard to decipher because the letterforms are
not created properly. The tryouts for the 7th sketch is quite
interesting. There is more rework needed to be done so that the
mug looks clearer, because now all the letterforms are outside the
mug. The mug does not look like a mug that way. Explore the mug
with the "S" letter and try to put the "CPH" in some way that
supports the communication message of the mug.
Week 9-
General Feedback: Use the key artwork as the main piece for the poster and
reintroduce the key artwork in its full form.
Specific Feedback: The
idea is fine but the key artwork should be utilized in a bigger manner so
that it just gets cropped completely and utilize the
clarity and spaces to paste the information that is there.
Introduce the key artwork in a full self and paste the
initials into it as well.
REFLECTIONS
Experiences
This assignment was tougher than I thought it was incredibly
time-consuming but the end results make it worthwhile. The
limitations of using our initials to create a logo that will be
based on an occupation of our choice were definitely squeezing all
my brain juice out, looking back at how I was able to visualize a
cake, cookie and even a mug surprises me on how a slight change of
structure can make you visualize a new thing. I struggled the most
with the posters, ideas were incredibly blocked not a fun process
but I was happy with the results. I personally hate to use after
effects but this time doing the animated invite felt different, it
was actually so much fun. The one thing that I struggled with the
collateral was finding a perfect image base for it.
Observation
Through my observation, I found that using different thicknesses
of lines can change the whole harmony and balance of a logo, thick
lines make it very chunky while thinner lines make it look more
refined. The colours I picked was a bold choice to make, the neon
colours kept hurting my eyes while making the posters, so looking
at the pov of a public audience I will feel irritated by the
colours being way too bright, so through that thought, I made the
decision to darken the neon green a little to make it easier for
the eyes.
Findings
I found that being able to create a visual that is able to
communicate with others is important, for example, if you want to
own a furniture shop it is best to have furniture aspects in your
logo, or a music shop with music aspects so for a cafe it makes
sense to have a mug filled with coffee and a manga cafe needs books
so adding those two aspects together will create the best visual
communication. In addition to the poster layout, making the
layout related to the theme was incredibly hard, especially with the
limit of using elements in the logo, sometimes I find making things
simpler the better, and complicated things will not be able to make
the viewers or audiences to get the meaning of it.
FURTHER READINGS
Fig. 1.1 Typographic design: Form and communication (23/5/2022)
Honestly, when coming out with a layout idea for the poster it
was hard. I did not know how to make my key artwork pop out and
the other elements kept overtaking it. So I decided to look
through this book to learn more about how to structure the
layout and create space between each one of the
elements.

Fig. 1.2 Structure and space (Page 67)
Looking at proportion was also important as it helps with
the balance and scaling of the elements.

Fig. 1.3 Proportion (Page 68)
Lines are selectively removed from the grids to discover
new spatial divisions is a process that trains the eye for
proportional possibilities. This technique helps with
learning how to section out places for the content that is
there.

Fig. 1.4 Grid layout (Page 70)
REFERENCES
Fig. 1.1-1.9 Perception and organization
From week 5 lecture slides
Fig. 1.1 Inspiration 1 (25/4/22)
https://www.pinterest.com/pin/858780222705554511/
Fig. 1.2 Inspiration 2 (25/4/22)
https://www.pinterest.com/pin/858780222705554038/
Fig. 1.3 Inspiration 3 (27/4/22)
https://www.pinterest.com/pin/858780222705555820/
Fig. 1.4 Inspiration 4 (27/4/22)
https://www.pinterest.com/pin/858780222705561325/
Fig. 1.5 Inspiration 5 (27/4/22)
https://www.pinterest.com/pin/858780222705582407
Fig. 1.6 Inspiration 6 (27/4/22)
https://www.pinterest.com/pin/858780222705627859/
Fig. 4.1 Poster inspiration 1 (15/5/22)
https://www.pinterest.com/pin/858780222705482398/
Fig. 4.2 Poster inspiration 2 (15/5/22)
https://www.pinterest.com/pin/858780222705482322/
Fig. 4.3 Poster inspiration 3 (15/5/22)
https://www.pinterest.com/pin/858780222705482400/
Further Readings
Fig. 1.1 Typographic design: Form and communication (23/5/2022)


Comments
Post a Comment